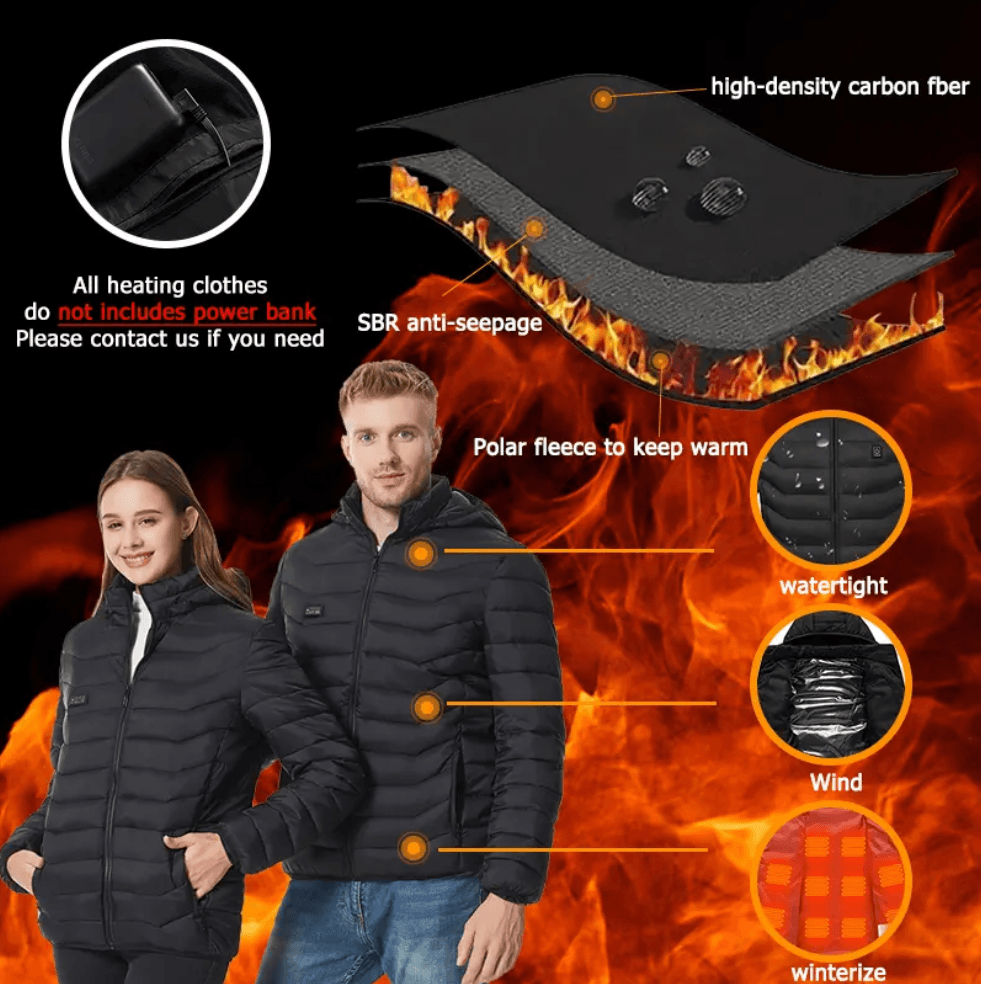
How you store it now decides whether it’ll power up perfectly next season or leave you with a dead battery and a heating element that just… doesn’t. We’ve heard the horror stories: batteries left in damp basements, vests crammed into the back of a closet with wires bent all wrong.
The good news: proper heated vest battery storage and a few simple habits keep your gear working like new. Here’s what to clean, how to fold, where to store, and the small mistakes that quietly shorten your vest’s life.
Step 1: Power Off and Disconnect the Battery Pack
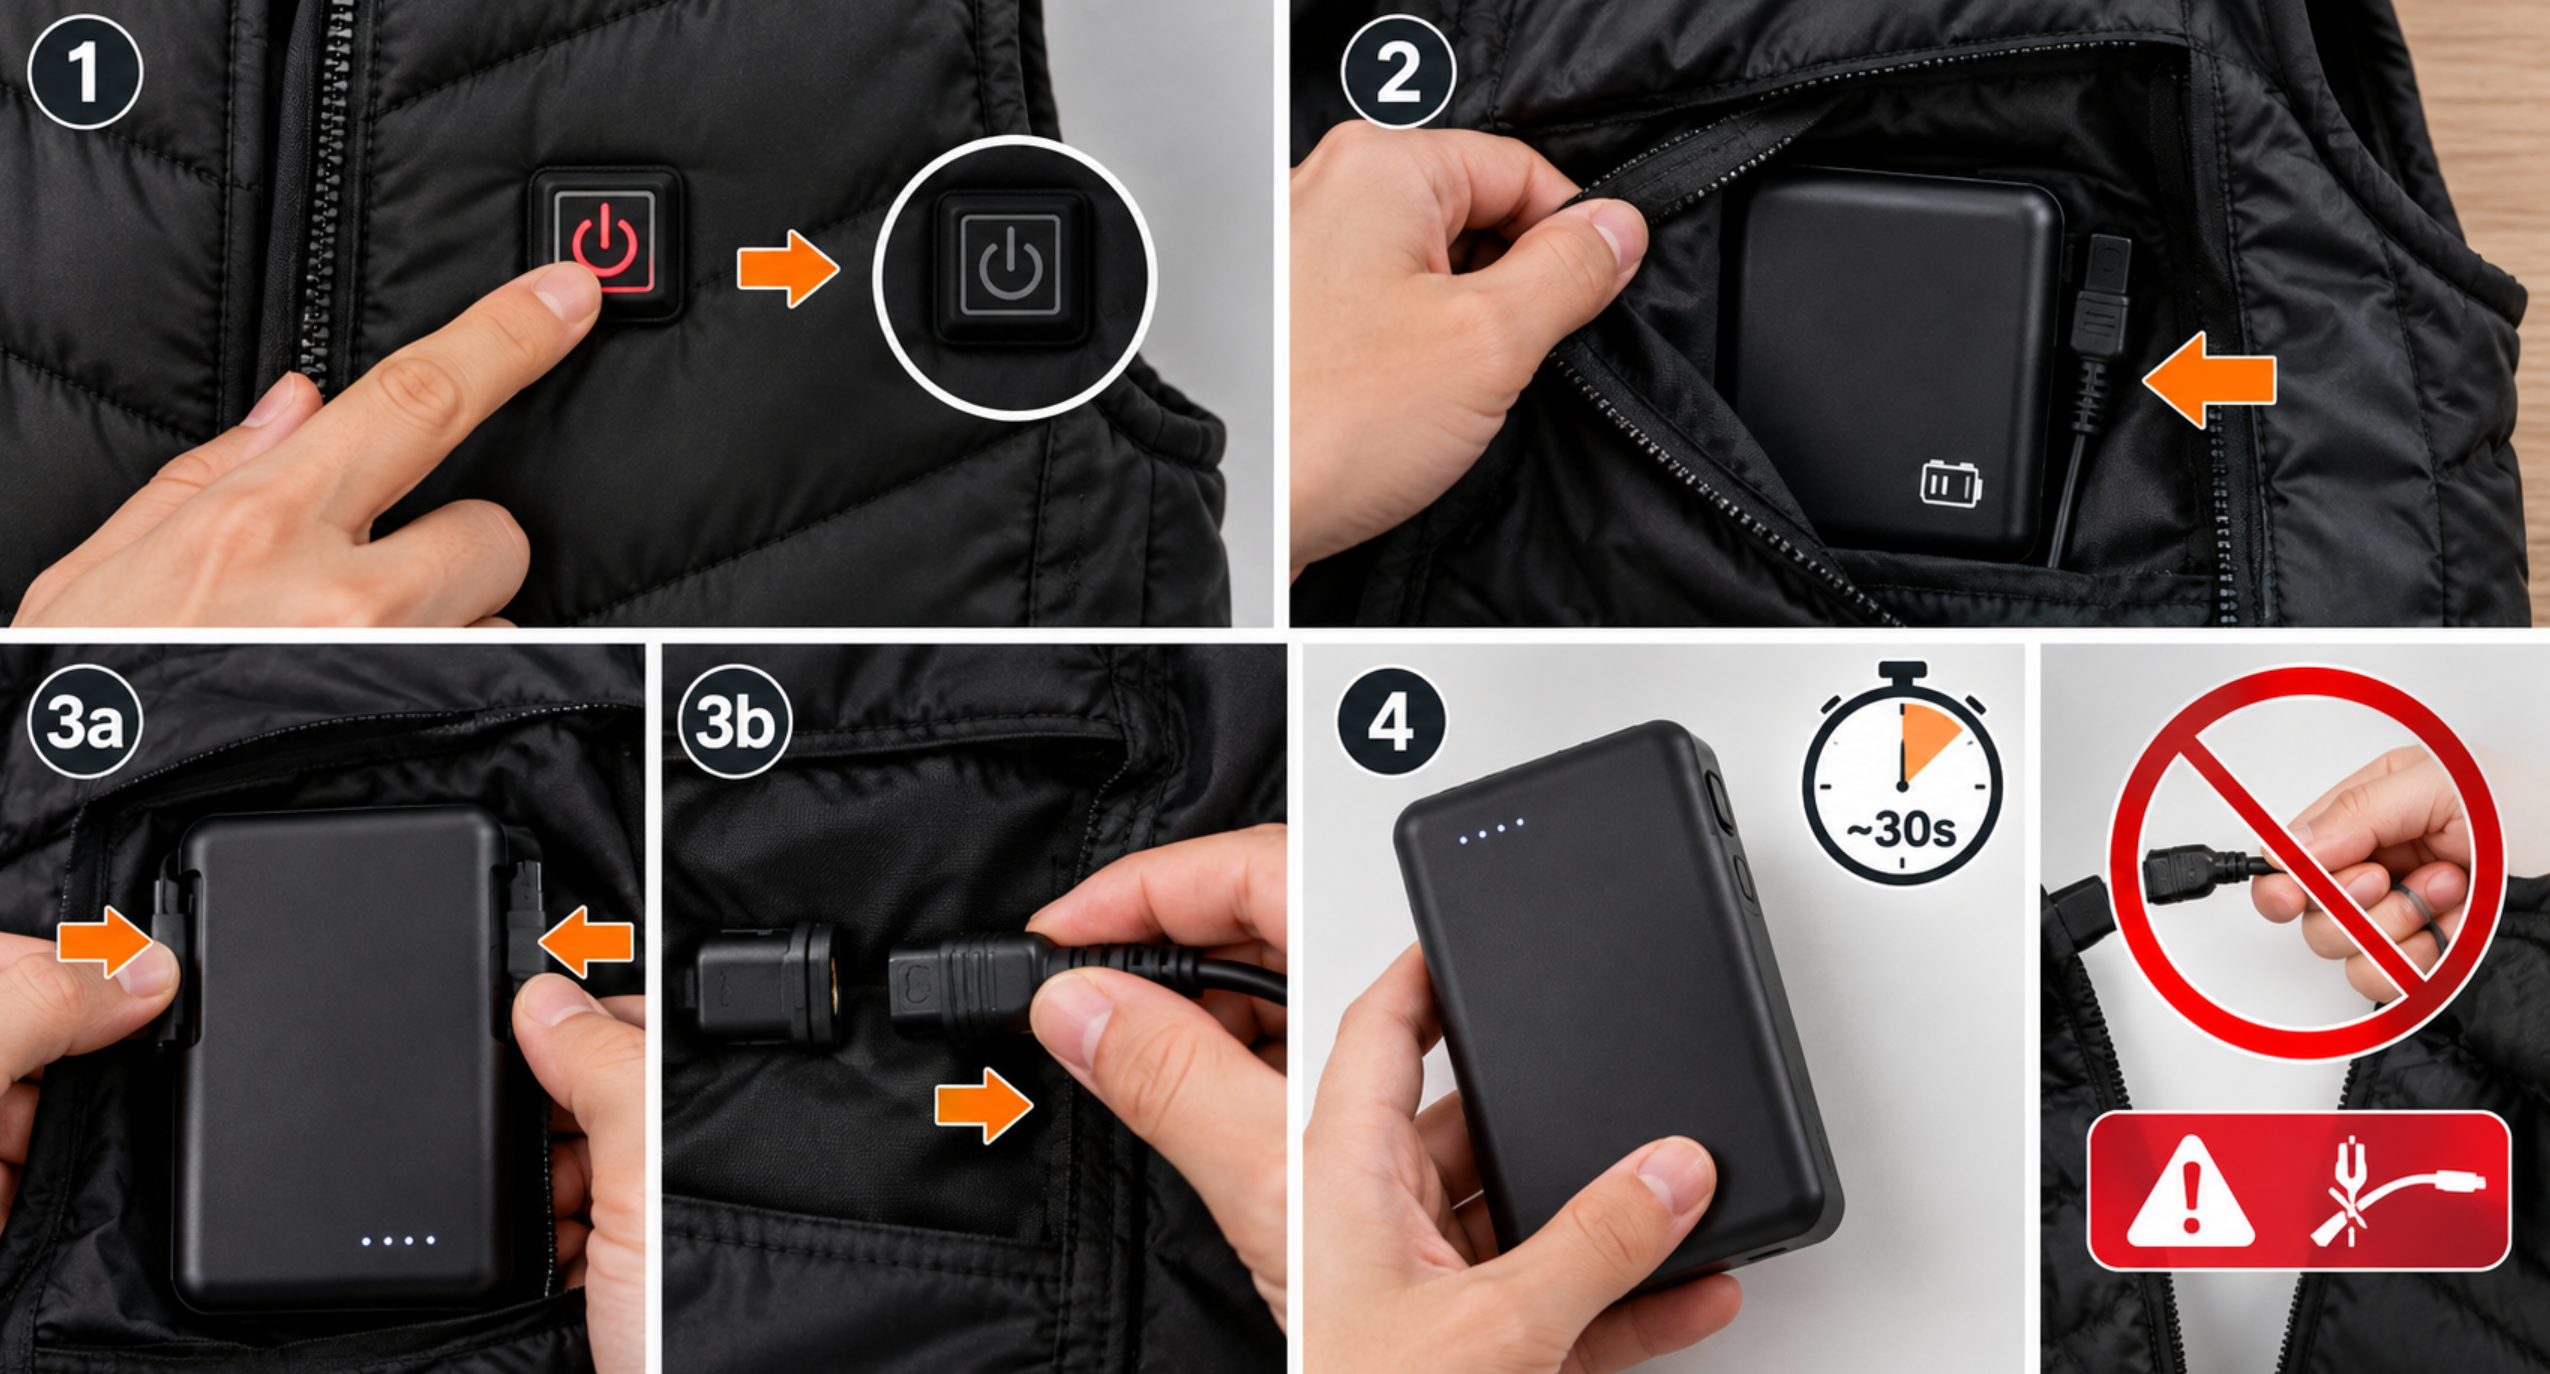
Skip this step, and everything else you do is pointless. Disconnecting the battery is different from just turning off the vest. Mistaking the two is the fastest way to shorten your heated vest lifespan before summer even starts.
Why disconnecting matters so much:
It prevents accidental power-on. A vest that's off but still connected can flip back on inside a storage bag, heating up with nobody around.
It stops short circuits before they start. If the battery terminals touch keys, coins, or loose metal in a drawer, that's enough to spark shorting — and in rare cases, burns or fire.
It protects against deep discharge. Left connected, batteries drain even in standby. Over months, that over-discharge kills battery health.
It keeps the wiring intact. Corrosion, moisture, and constant low-level current at the connector point are common causes of heating malfunctions next season.
How to do it right:
Power down the vest first. Then locate the battery pocket, usually sewn into the inner lining. Depending on your model, you'll either press release buttons to unclip the pack, or gently pull the connector straight out of the port. Never yank the cable itself — pull the battery pack, not the wire. Some vests take up to 30 seconds to power down after disconnecting, so don't rush the next step.
Step 2: Clean the Heated Vest Before Storage
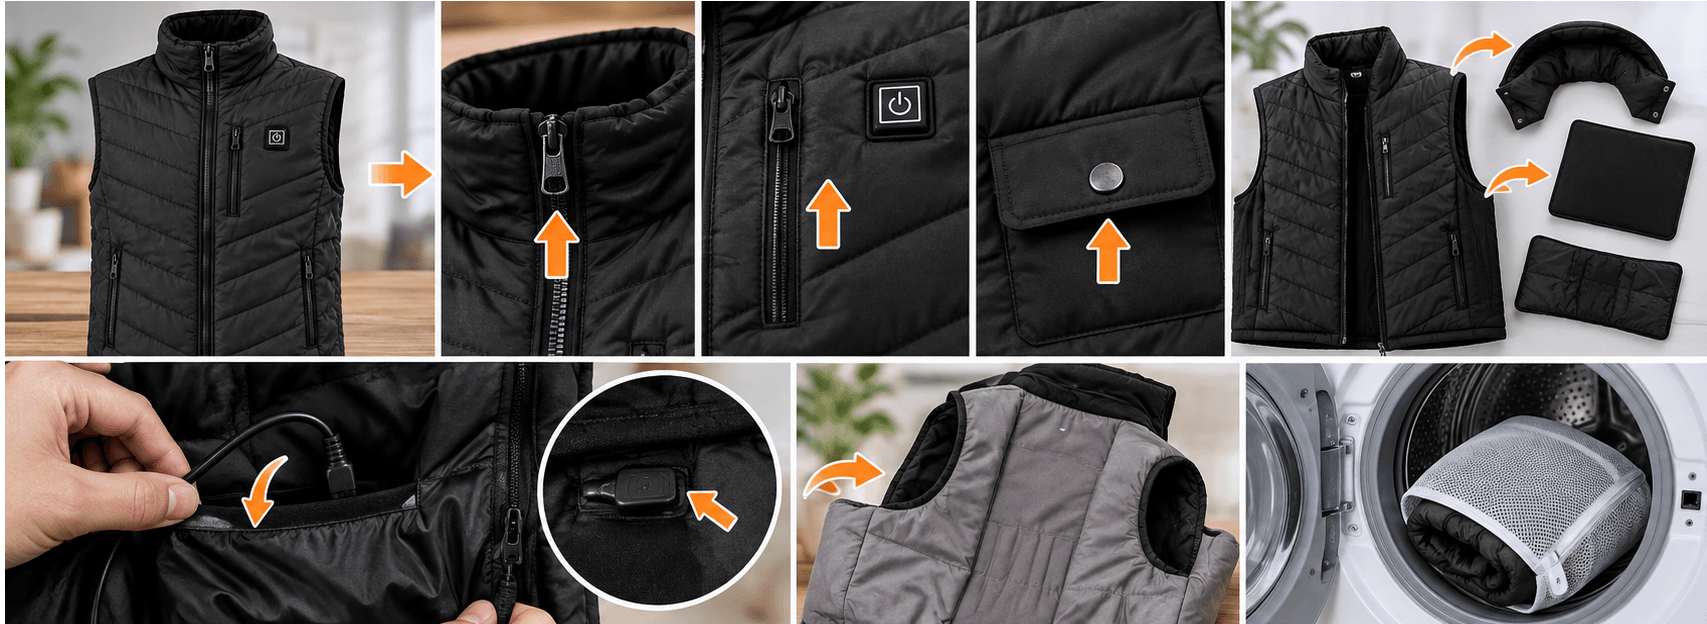
Don't let a season's worth of sweat, dirt, and body oils sit in the fabric all summer. That leads to musty smells and, worse, fabric breakdown around the heating elements. Cleaning now is one of the best things you can do for heated apparel maintenance.
Always check the label first. Before you touch water or detergent, look for four things on that care tag: whether it's machine washable or hand-wash only, what water temperature is safe, whether tumble drying is allowed, and whether bleach or dry cleaning is off-limits.
For most vests, cold water hand washing is the safest bet. With the battery already disconnected gently wash the vest in cold water. If your label allows machine washing, use a mesh laundry bag on the delicate or gentle cycle—cold water only, low spin. Skip top-loading washers with center agitators; they twist and pull fabric in ways that can damage internal wiring.
Around the heating panels, be gentle. Don't scrub, wring, or crumple that area. You risk damaging the wiring or the adhesive holding everything in place. A soft cloth or sponge with light pressing motions works best. Before washing anything, tuck the connector cable into its pocket and zip it shut so it doesn't snag or take on water.
Skip harsh chemicals. Use a small amount of mild, neutral detergent. Avoid bleach, fabric softener, and dry-cleaning fluid. Manufacturers warn that dry-cleaning solvents can deteriorate the insulation around heating elements.
Rinse thoroughly, press out excess water (never wring), then lay flat or hang to air dry completely before moving to the next step.
Step 3: Ensure the Vest Is Completely Dry
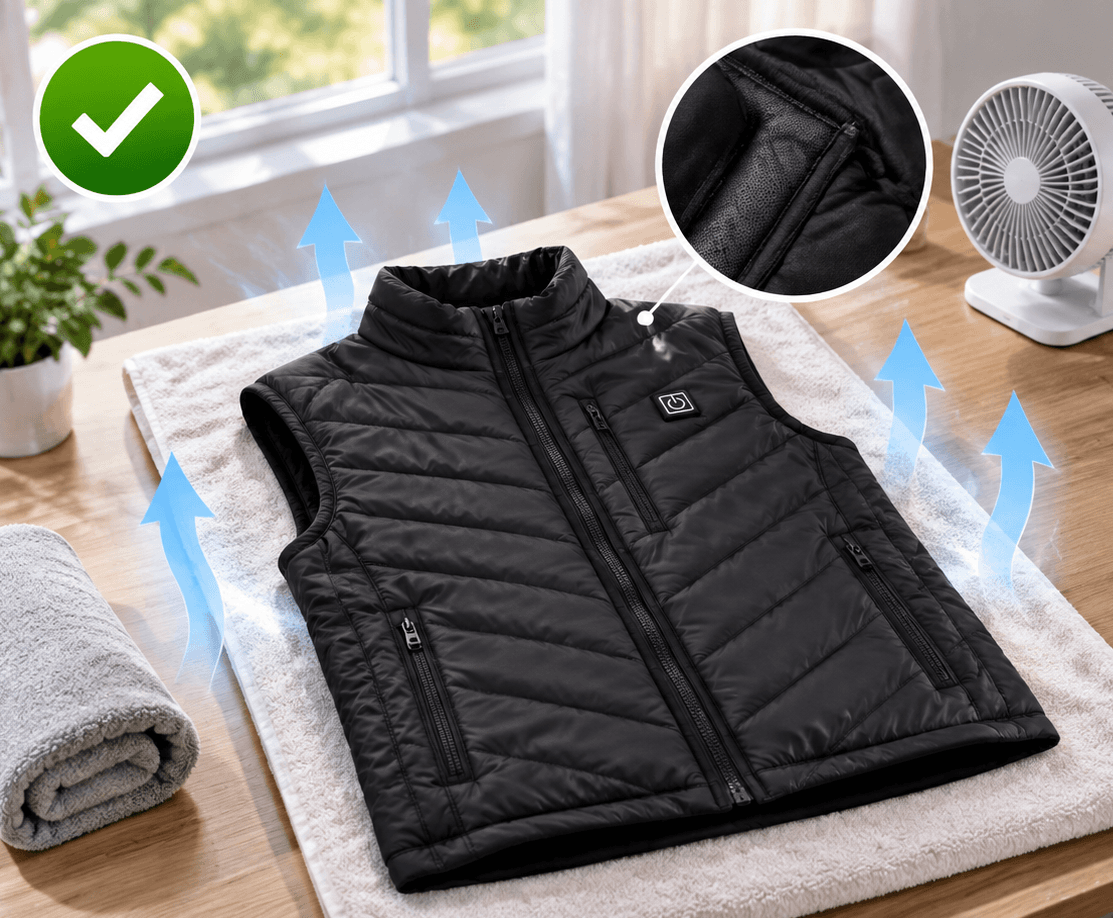
Air is your best friend here. Lay the vest flat or hang it in a well-ventilated spot, away from radiators, dryer racks, or direct sun. Most care labels say "line dry" or "lay flat to dry only." A handful of brands allow low-heat tumble drying, but check your label before risking it. High heat and tumbling can damage heating wires, snap internal connections, or weaken the adhesive holding heating panels in place.
How to Know It's Dry
Run your hand over the whole vest: outer shell, lining, pockets, zipper areas, and around the connector port. No cool spots. No dampness. Press on thick seams and folded areas; they shouldn't feel sticky or cold. If your vest has a removable battery, don't reconnect it until every inch passes this test.
Why Skipping This Step Backfires
Storing a slightly damp vest invites trouble. Metal contacts and wiring left damp can oxidize, causing poor connections or corrosion. Repeated moisture also breaks down adhesive layers and seams over time, leaving your heated jacket care routine undone by one skipped step.
Step 4: Store the Battery Separately (Heated Vest Battery Storage)
Batteries have their own rules. They don't care about what's convenient for your closet space. Rushing through this step is exactly why so many heated vests "mysteriously" die over the summer.
Temperature matters more than you'd think. The sweet spot for heated vest battery storage is 15–25°C (59–77°F). Anything above 30°C speeds up self-discharge and chemical aging inside the cell. Push past 45°C, and you're in real risk territory: think garages in July, car trunks, or a shelf right above the radiator. Too cold isn't great either; it just doesn't wreck things quite as fast.
How full the battery should be depends on your timeline.
Storing for a few days to a few weeks (maybe you're traveling, or swapping batteries between uses): keep it near full charge so it's ready to go.
Storing for the whole off-season (weeks to months): aim for 40–60% charge, roughly 50%. This puts the least chemical stress on the cell and best preserves capacity long-term.
Leaving a battery at 100% for months accelerates aging. Fifty percent is the safer default when the vest is going into hibernation.
Where you put it counts too. Choose a dry, cool, temperature-stable spot, never a sealed, humid container. Moisture invites terminal corrosion. And skip bare metal tins or drawers with loose keys and coins; contact with the terminals can cause a short. An insulated pouch, the original packaging, or a non-conductive storage box is the safer call for storing electric heated clothing batteries.
Step 5: Fold Loosely or Hang the Vest Properly
People crumple the vest into a tight little ball because it feels efficient. It's not. Sharp creases across the heating panels and wiring cause wire fatigue over a long off-season.
Less folding, looser folding. Hanging beats folding because it removes tension and pressure from the wires.
If you fold, fold smart:
Take the battery out first (yes, again — this matters every time you handle the vest).
Smooth the fabric flat with your hands before folding anything.
Never fold along the chest or back panels where the heating elements sit.
Use wide, shallow folds instead of narrow ones, and avoid pressing the same crease repeatedly.
If you hang it, choose the right hanger. Wide-shoulder, curved, smooth hangers distribute weight evenly and won't leave shoulder dents. Skip thin wire hangers or anything with sharp edges; those create pressure points where wiring runs.
Two things to never do: stack heavy items on top of the vest, or roll it tightly into a bag or drawer. Both stress the wires until something fails.
Quick storage template:
Battery out → smooth flat → hang on a wide hanger or fold loosely once or twice → store somewhere dry, with nothing pressing on top.
Step 6: Choose the Right Storage Environment (Off-Season Storage Tips)
Location makes or breaks your off-season storage plan. A vest can be spotless and perfectly dry, and still degrade if it sits in the wrong spot for four months.
Aim for 12–18°C (54–64°F) with 50–55% relative humidity, somewhere dry, dark, and well-ventilated. General clothing storage guidelines allow a slightly wider range — around 55–80°F (13–27°C) and 30–50% RH — but off-season storage needs tighter control than a quick weekend stash.
Avoid light exposure. Direct sun or prolonged light breaks down fabric fibers and can degrade the adhesive around heating panels. Keep the vest away from exterior walls, windows, and floors too; those spots swing in temperature and humidity more than interior storage does.
Closet vs. Storage Bin vs. Vacuum Bag
Closet: Best for short-term or between-season storage. Easy access, but keep the vest away from outer walls and floors, and consider a humidity monitor if your closet runs damp.
Lidded storage bin: The safer pick for long-term off-season storage. It blocks moisture and pests better than open shelving. Add a silica gel packet inside, and raise the bin off the floor to avoid cold, damp transfer.
Vacuum-sealed bags: Skip these for heated vests. They're fine for cotton or bedding, but the compression and sealed, humid-prone environment aren't kind to wiring, structured panels, or wool blends.
A humidity gauge inside your storage bin is a small investment that tells you exactly when conditions drift out of that 45–55% RH sweet spot.
Short-Term vs Long-Term Storage: Key Differences
Not every storage situation is the same. A weekend stash and a six-month hibernation need different handling.
Short-term storage (a few days to a few weeks between wears) is the easy version. Charge to 40–60%, disconnect the battery so it’s not draining on standby, tuck everything into a cool, dry spot around 15–25°C, and that’s it. A quick visual check now and then is plenty.
Long-term storage (a full off-season, or longer) asks more of you. Take the battery out of the vest entirely, both for safety and to stop any slow parasitic drain. Aim for a slightly cooler range too, closer to 5–20°C, and keep it there consistently rather than letting it swing.
Long-term batteries need a checkup. Tektronix’s battery guidelines say that after six months idle, you should check the charge and top it back up to around 50%. Most lithium battery storage tips agree on a 3–6 month recheck cycle.
Common Mistakes to Avoid When Storing a Heated Vest
Nobody warns you until your vest doesn't work. Here's where most heated vests actually die.
Storing at 0% charge. Draining a lithium battery flat before storage often kills it completely — deep discharge means the battery may never take a charge again.
Storing at 100% in heat. A full charge in temps above 85–90°F (29–32°C) ages the battery fast. Do both together, and capacity drops hard.
Skipping the battery disconnect. Leave it plugged in and you get slow drain, worn contacts, and accidental power-ons.
Mixing batteries with metal. Coins, keys, nails in the same drawer create a short-circuit risk.
Piling weight on heating panels. Compression damages the wiring underneath.
Forgetting recharge cycles. Most guides say to top up every 2–6 months, usually every 2 or 3–4 months.
One scenario that shows up constantly in reviews: someone leaves the vest and battery in a car, garage, or closet all summer. Come winter, the battery's swollen, won't charge, and the heat zones are dead. Another one: "didn't recharge after last season, pulled it out in fall, totally dead." Both are avoidable.
Battery Maintenance During Storage (Recharge Schedule)
A lithium battery loses charge even when it's sitting there, doing nothing. Most drop about 5% in the first 24 hours alone, then settle into a slower slide of roughly 1–2% per month. LiFePO4 packs are gentler, usually 0.5–3% monthly. That's why a "set it and forget it" approach to heated vest battery storage backfires by spring.
The real damage happens at the extremes. One study found batteries drained down to 0.5V lost 38.2% of their capacity, permanently. Another tracked cells pushed to 0.5V and 0.0V, and found irreversible losses of 12.56% and 24.88%. That battery never recovers.
A reminder schedule that works:
Set a recheck every 3 months during long storage.
Top up whenever charge drifts below 50%. Some manufacturers use 60–70% as their conservative floor.
If your storage spot runs warm, shorten the cycle to every 1–2 months instead.
A phone reminder takes ten seconds to set. A dead battery costs a full replacement to fix.
Quick Storage Checklist
Print this, tape it inside your closet door, and check each box as you go. Seven steps, about two minutes.
☐ Power off — turn the vest completely off
☐ Disconnect battery — unplug or unclip it, don't just flip the switch
☐ Clean — hand wash or gentle cycle, cold water
☐ Air-dry fully — no cool or damp spots before you put it away
☐ Store battery separately — 40–60% charge, a cool dry spot, away from anything metal
☐ Fold loosely or hang — use a wide hanger or soft folds, nothing heavy on top
☐ Pick the right spot — cool, dry, dark, 12–18°C, off the floor and away from walls
Storage conditions: Keep humidity at 45–55%. The vest should sit at least 6 inches off the floor and away from exterior walls.
Reminder: Check the battery charge every 3 months. Replace any damaged storage bins, silica packets, or connector pouches before next season.
Conclusion
Your heated vest is an investment in warmer seasons ahead. How you treat it during the off months determines whether it'll be there for you next winter, working like new.
The formula is simple. Power it down, clean it properly, let it dry completely, and store the battery separately from the vest. Skip any one of these steps—especially rushing the drying process or leaving the battery connected—and you're gambling with corrosion, frayed wiring, or a battery that won't hold a charge when you need it most.
Treat storage as a small monthly ritual. A five-minute check-in every few weeks keeps everything running smoothly until you're ready to bundle up again.
Run through our checklist one more time before you tuck your vest away.